Sharp : iMac as a native high resolution display over Ethernet
Give your iMac a place beside your newer Mac. The story behind Sharp, and a short guide to getting it connected.
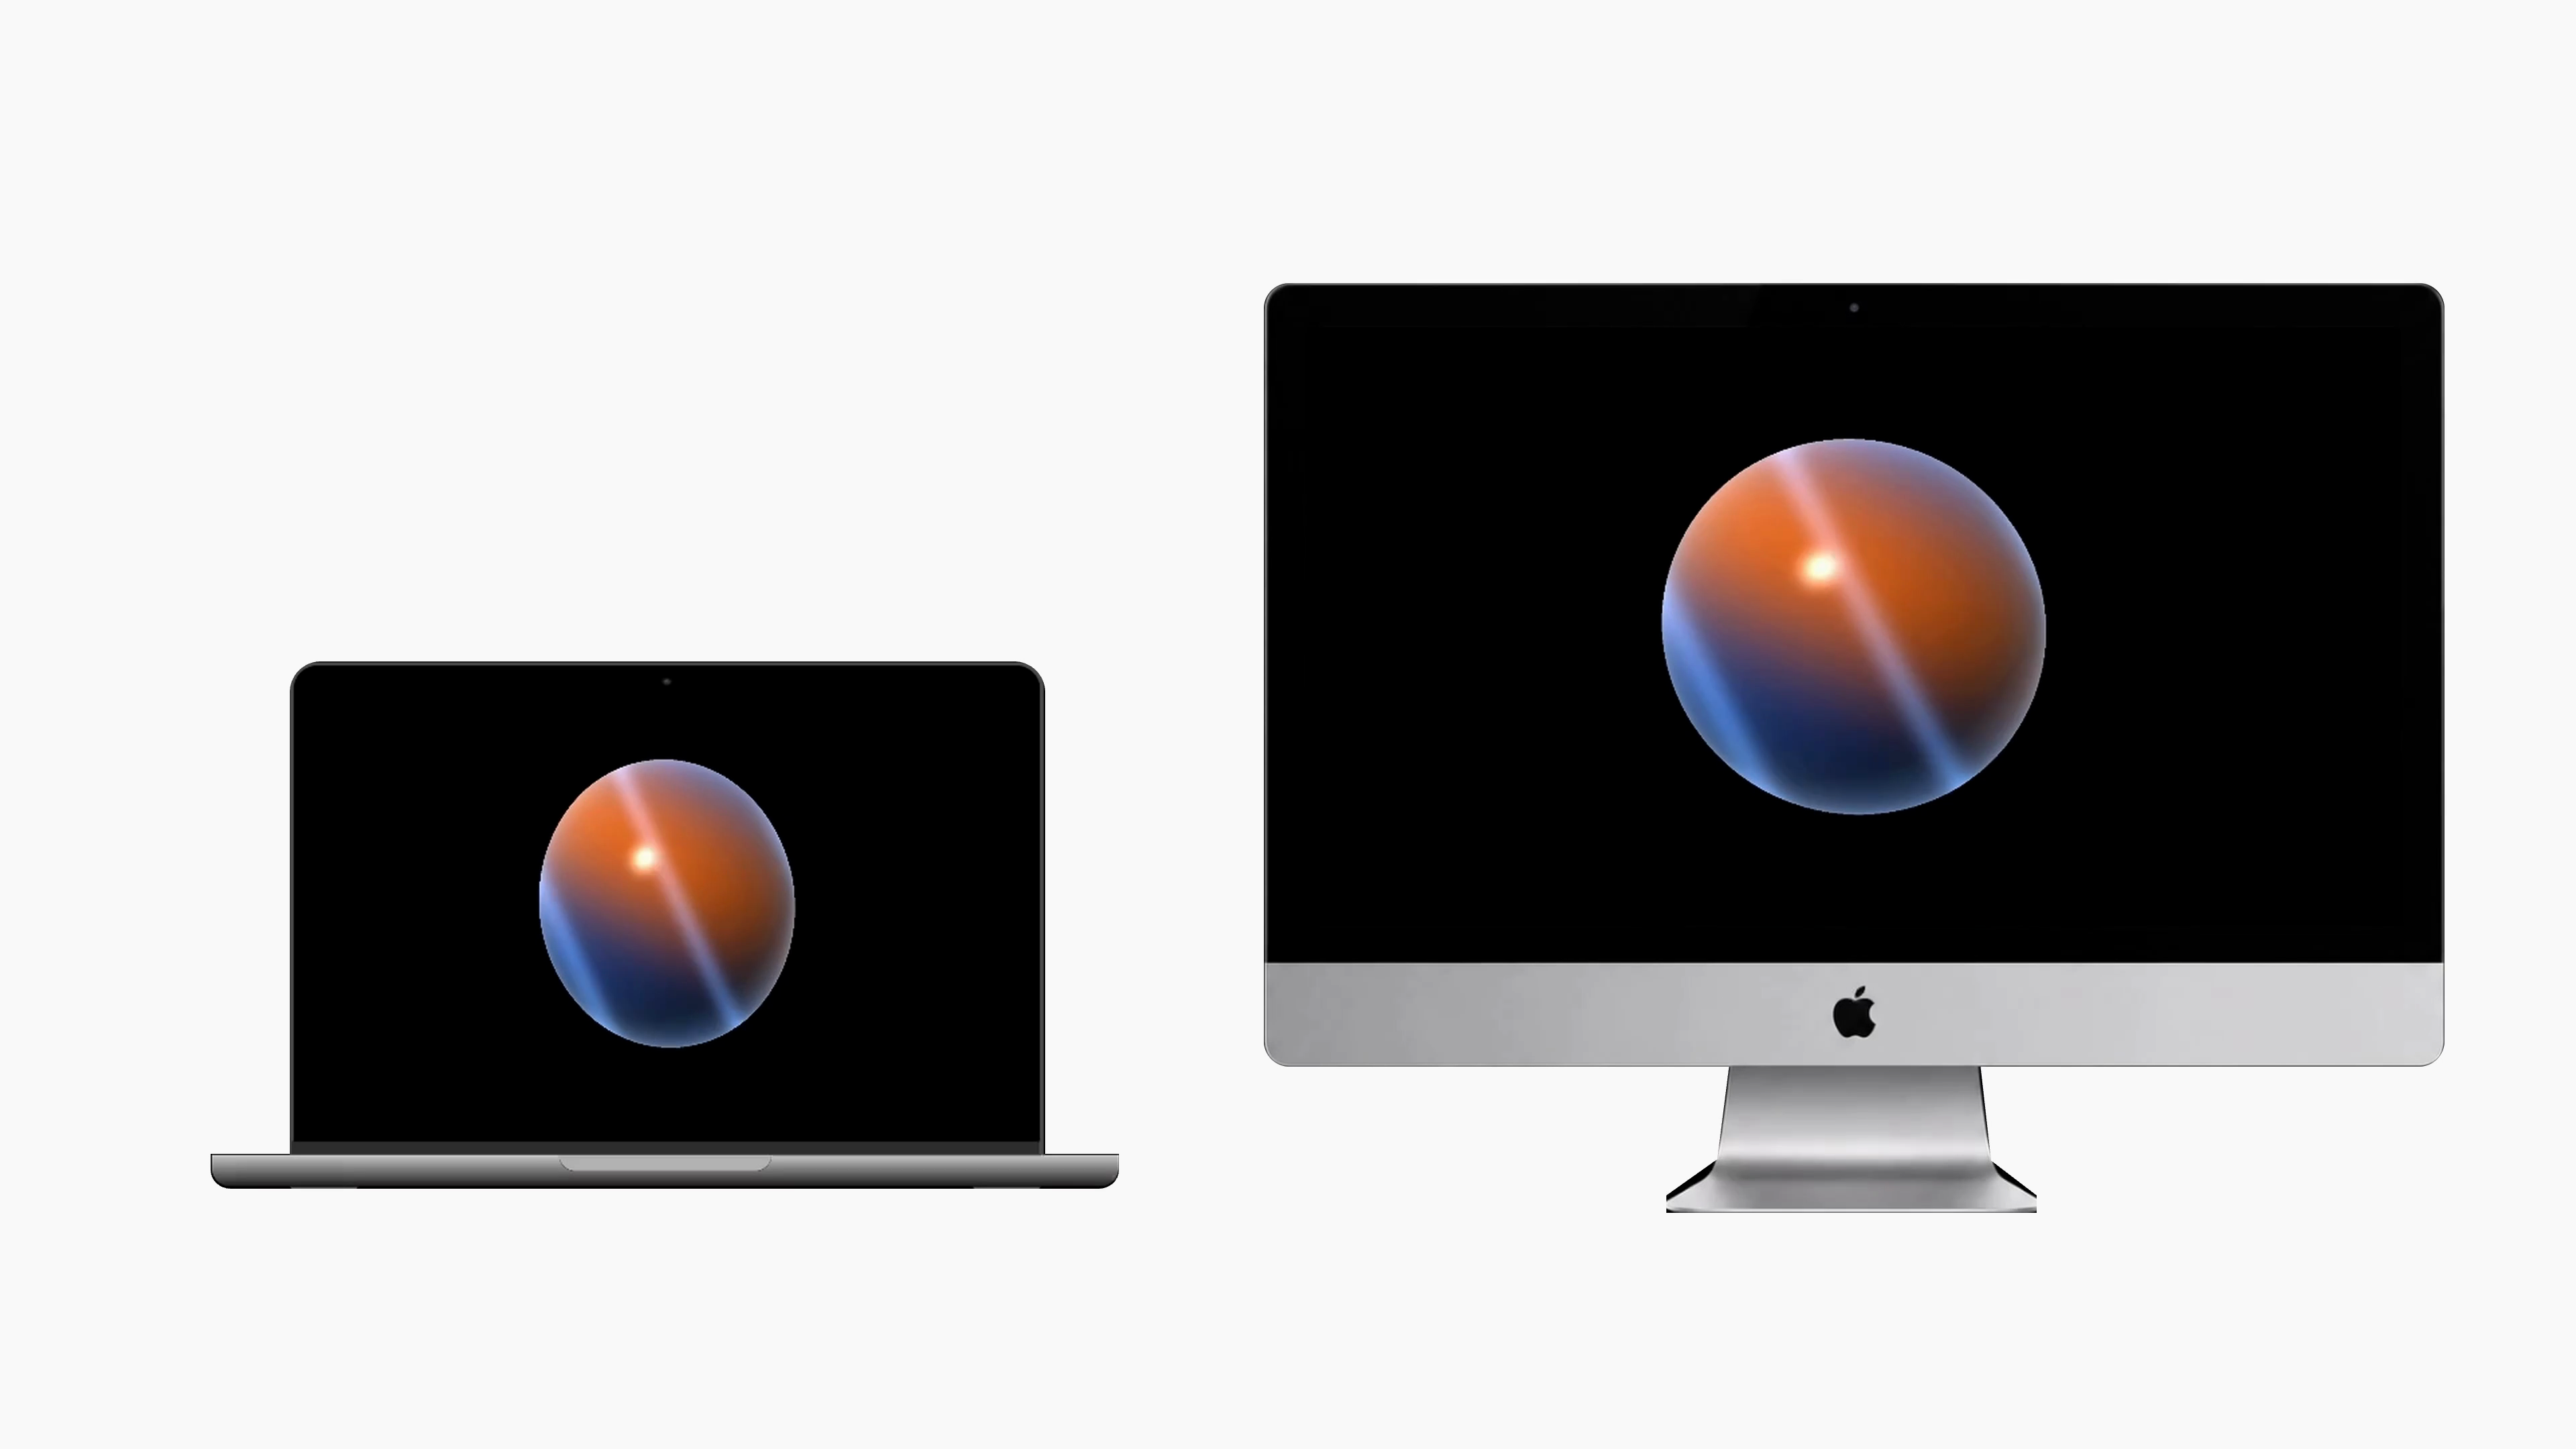
TL;DR
I still love the way old iMacs look. Even after all these years, I'm happy to daily drive one beside my silicon MacBook Pro. The gorgeous screen deserves more use than the ageing computer behind it can give it.
I wanted mine to become a second display. Connect a cable, move a window across, carry on working.
That turned out to be a much bigger request than I expected. Apple's Target Display Mode only works with certain older Macs and macOS versions. An Apple Silicon Mac doesn't qualify. I kept finding workarounds that needed specific hardware, lengthy setup, or paid software.
So I built Sharp. Install it on both Macs and connect them with Ethernet. You can mirror your desktop or extend it onto the iMac, with sound through its speakers if you like. It's free and open source.
Download Sharp if you have an iMac (or any compatible Mac) you'd like to use again. Setup below.
Why Ethernet?
I started by looking at the ports on the iMac. Ethernet was already there, and I could control the connection in software. A cable and an ordinary adapter for the MacBook felt like a reasonable thing you probably already own.
There was one problem. Raw 4K at 60 frames per second needs about twelve times the bandwidth of a gigabit connection. Sending the screen without compression wasn't going to work.
H.264 video would fit, but I wanted to spend hours doing technical work, reading code, articles AND watch shows on this display. Small letters and coloured edges make compression much easier to notice than it is in a film. So I came up with a system that combines both lossless and compressed video.
How the tiles system work
Imagine scrolling through a page, then stopping to read. During the scroll, you need the picture to keep up. Once you stop, you want the letters to look right.
Sharp sends a complete video image and places lossless tiles over the parts it can restore to full detail. Those tiles preserve the captured pixels without lossy compression. A still part of the desktop can regain its sharpness while something elsewhere keeps moving.
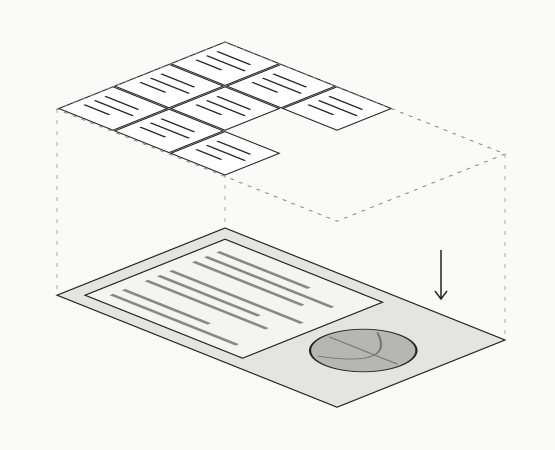
The tricky part is knowing whether a tile still belongs there. Each tile has a version number. Sharp checks it against the displayed video frame before showing it, so a tile from an earlier moment cannot cover newer content.
As the screen settles, more tiles arrive. Sharp removes the video underneath only after the receiving Mac confirms that the lossless tiles cover the whole image.
That's the idea behind the name. You should be able to stop scrolling and enjoy reading on that screen again.
Try it on your Macs
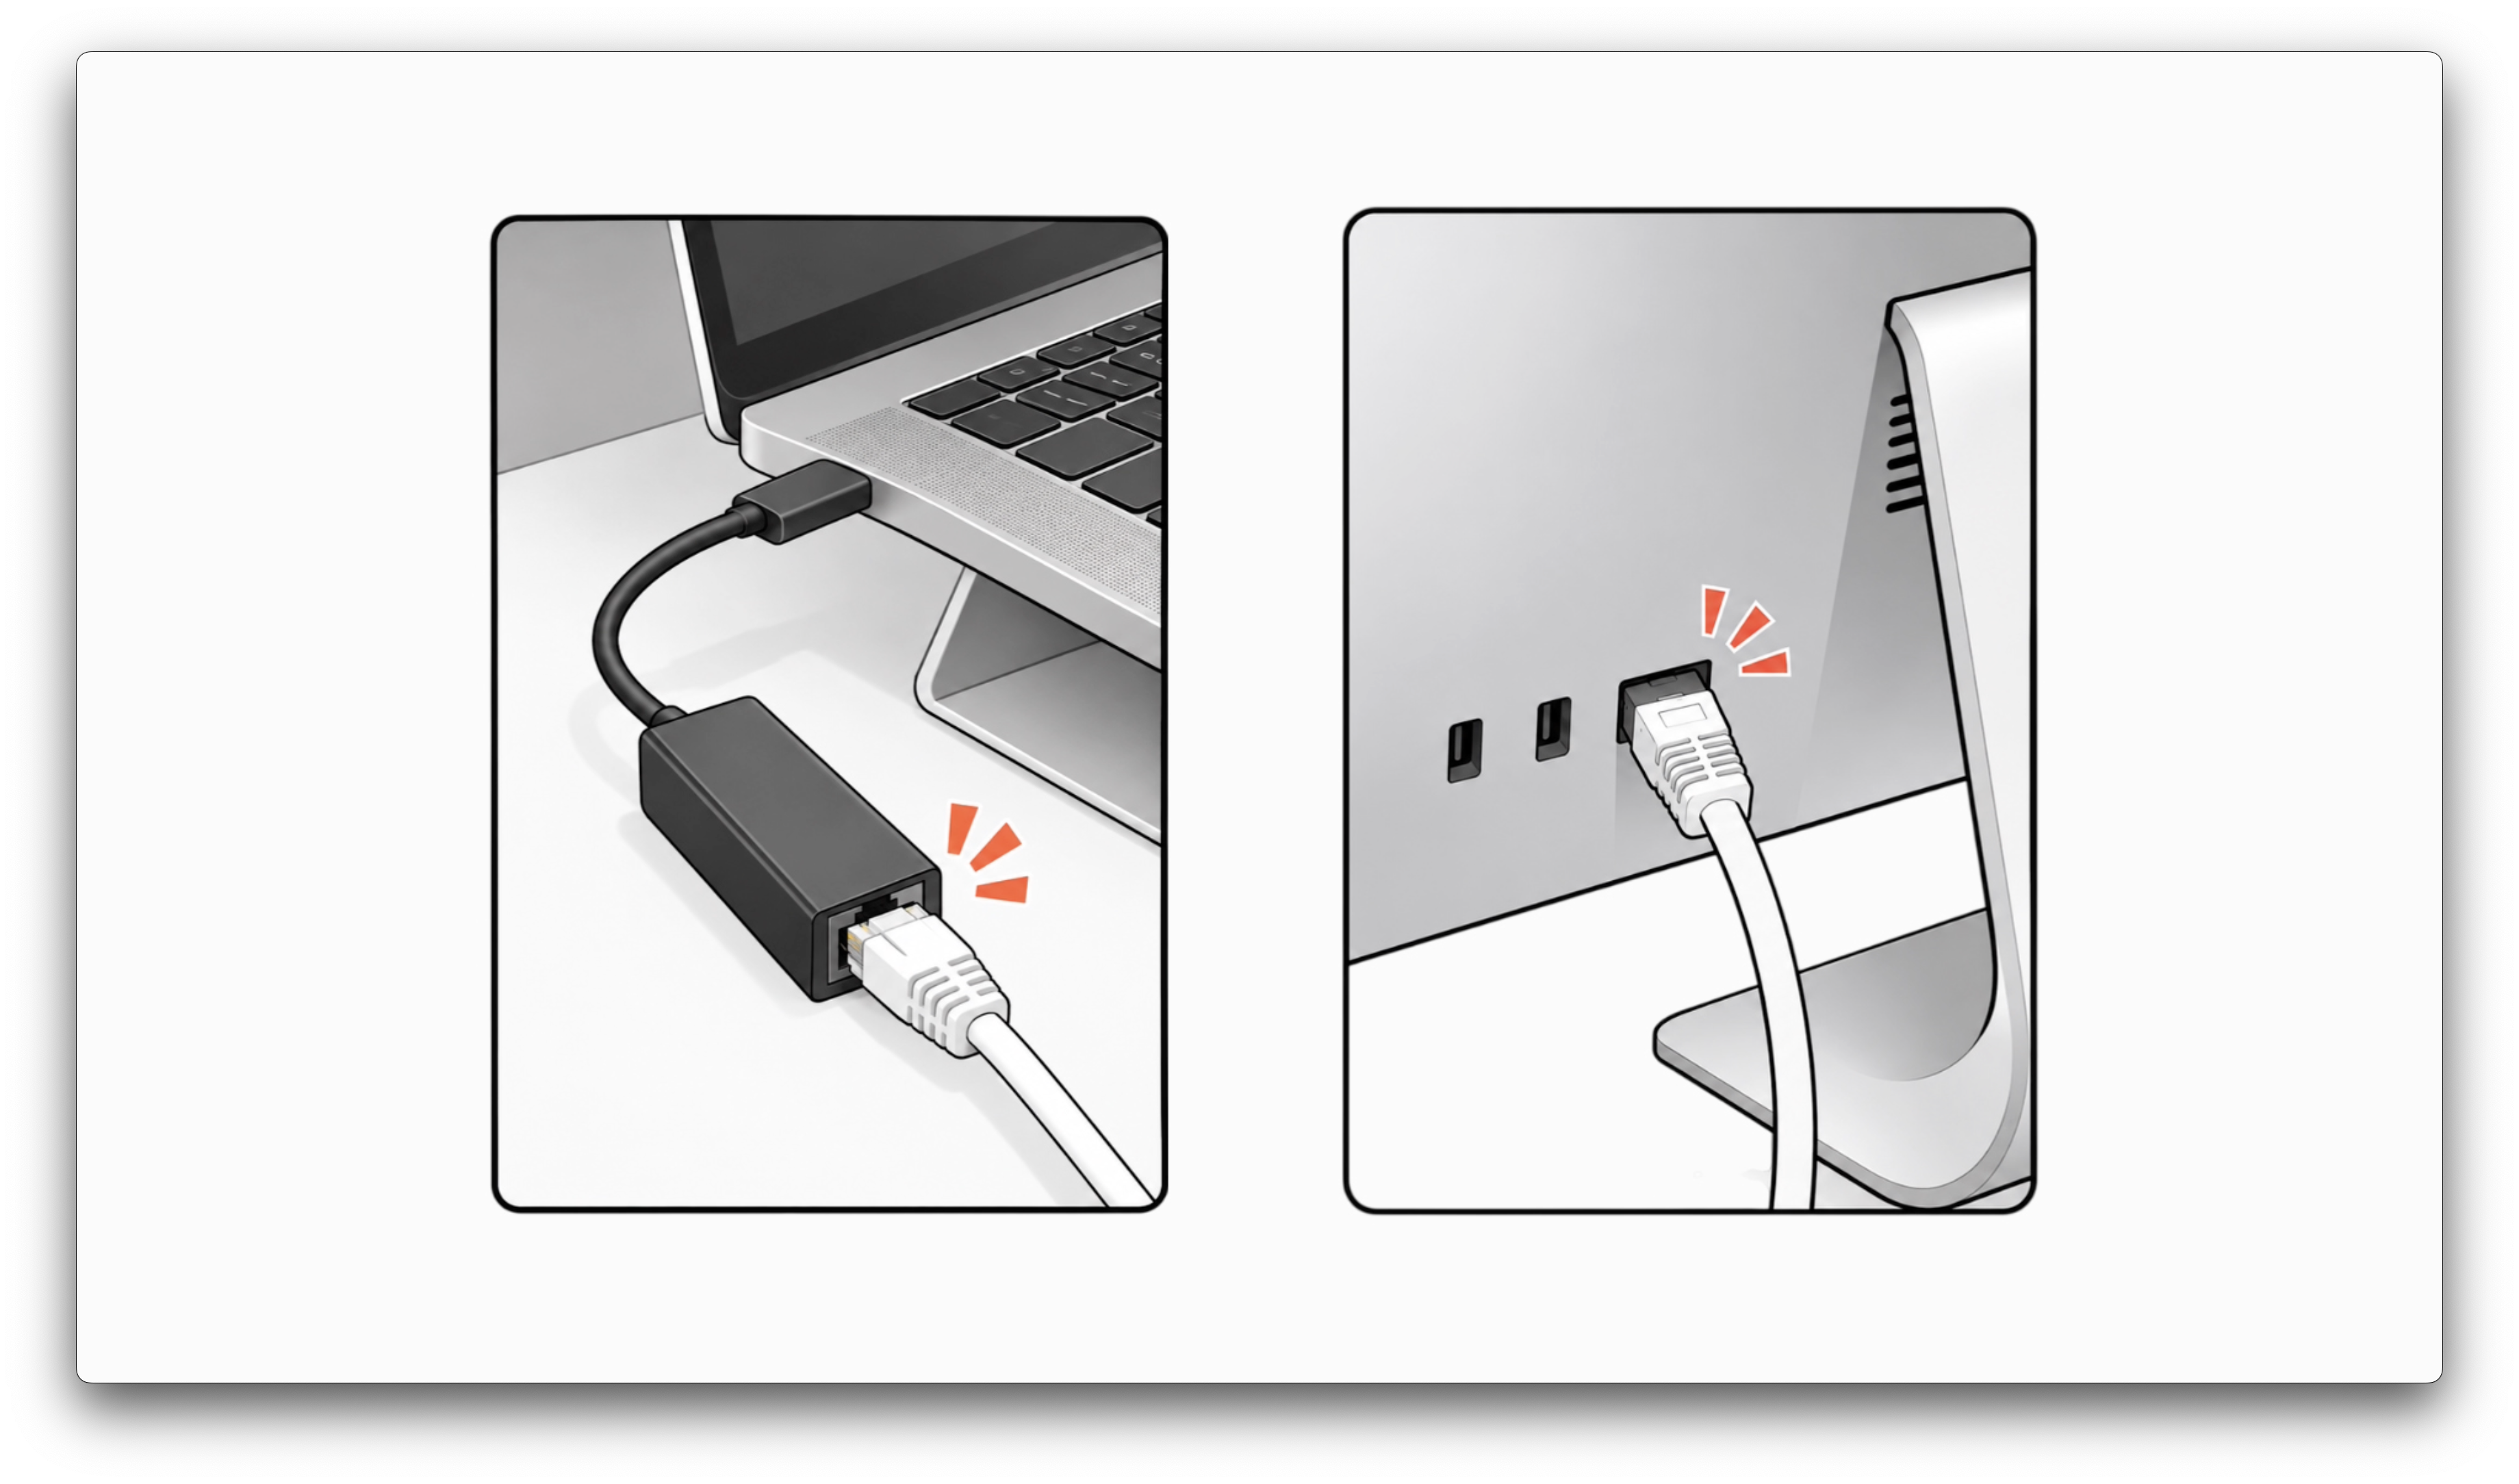
You'll need an Ethernet cable and a gigabit Ethernet adapter for any Mac without the port. Connect the Macs directly; you don't need a router.
The sending Mac needs macOS 12.3 or later. The receiving iMac needs macOS 10.15 or later. To send system audio, the sending Mac needs macOS 14.2 or later. The same installer works on Intel and Apple Silicon.
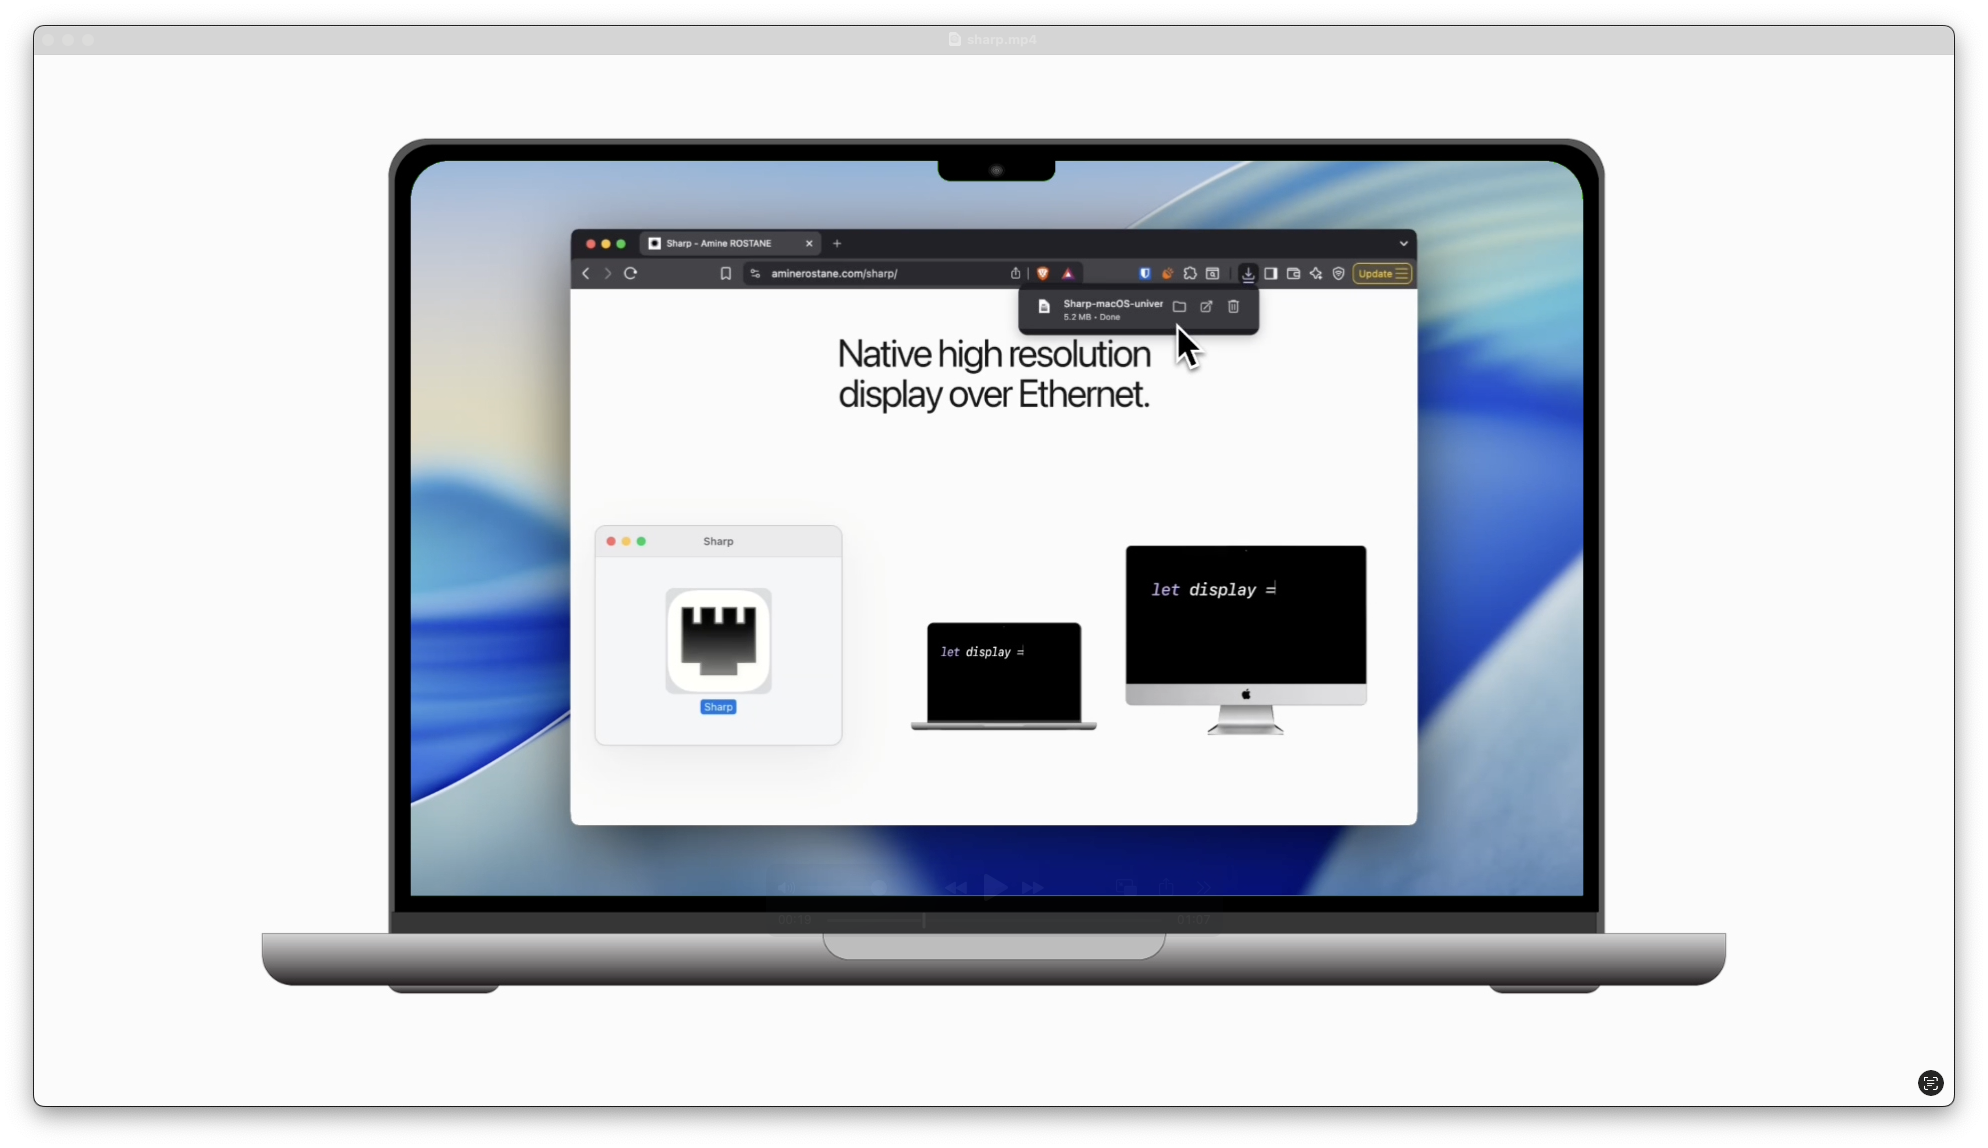
1. Download Sharp
Open aminerostane.com/sharp on each Mac and click the Sharp icon to download the installer.
2. Put it in Applications
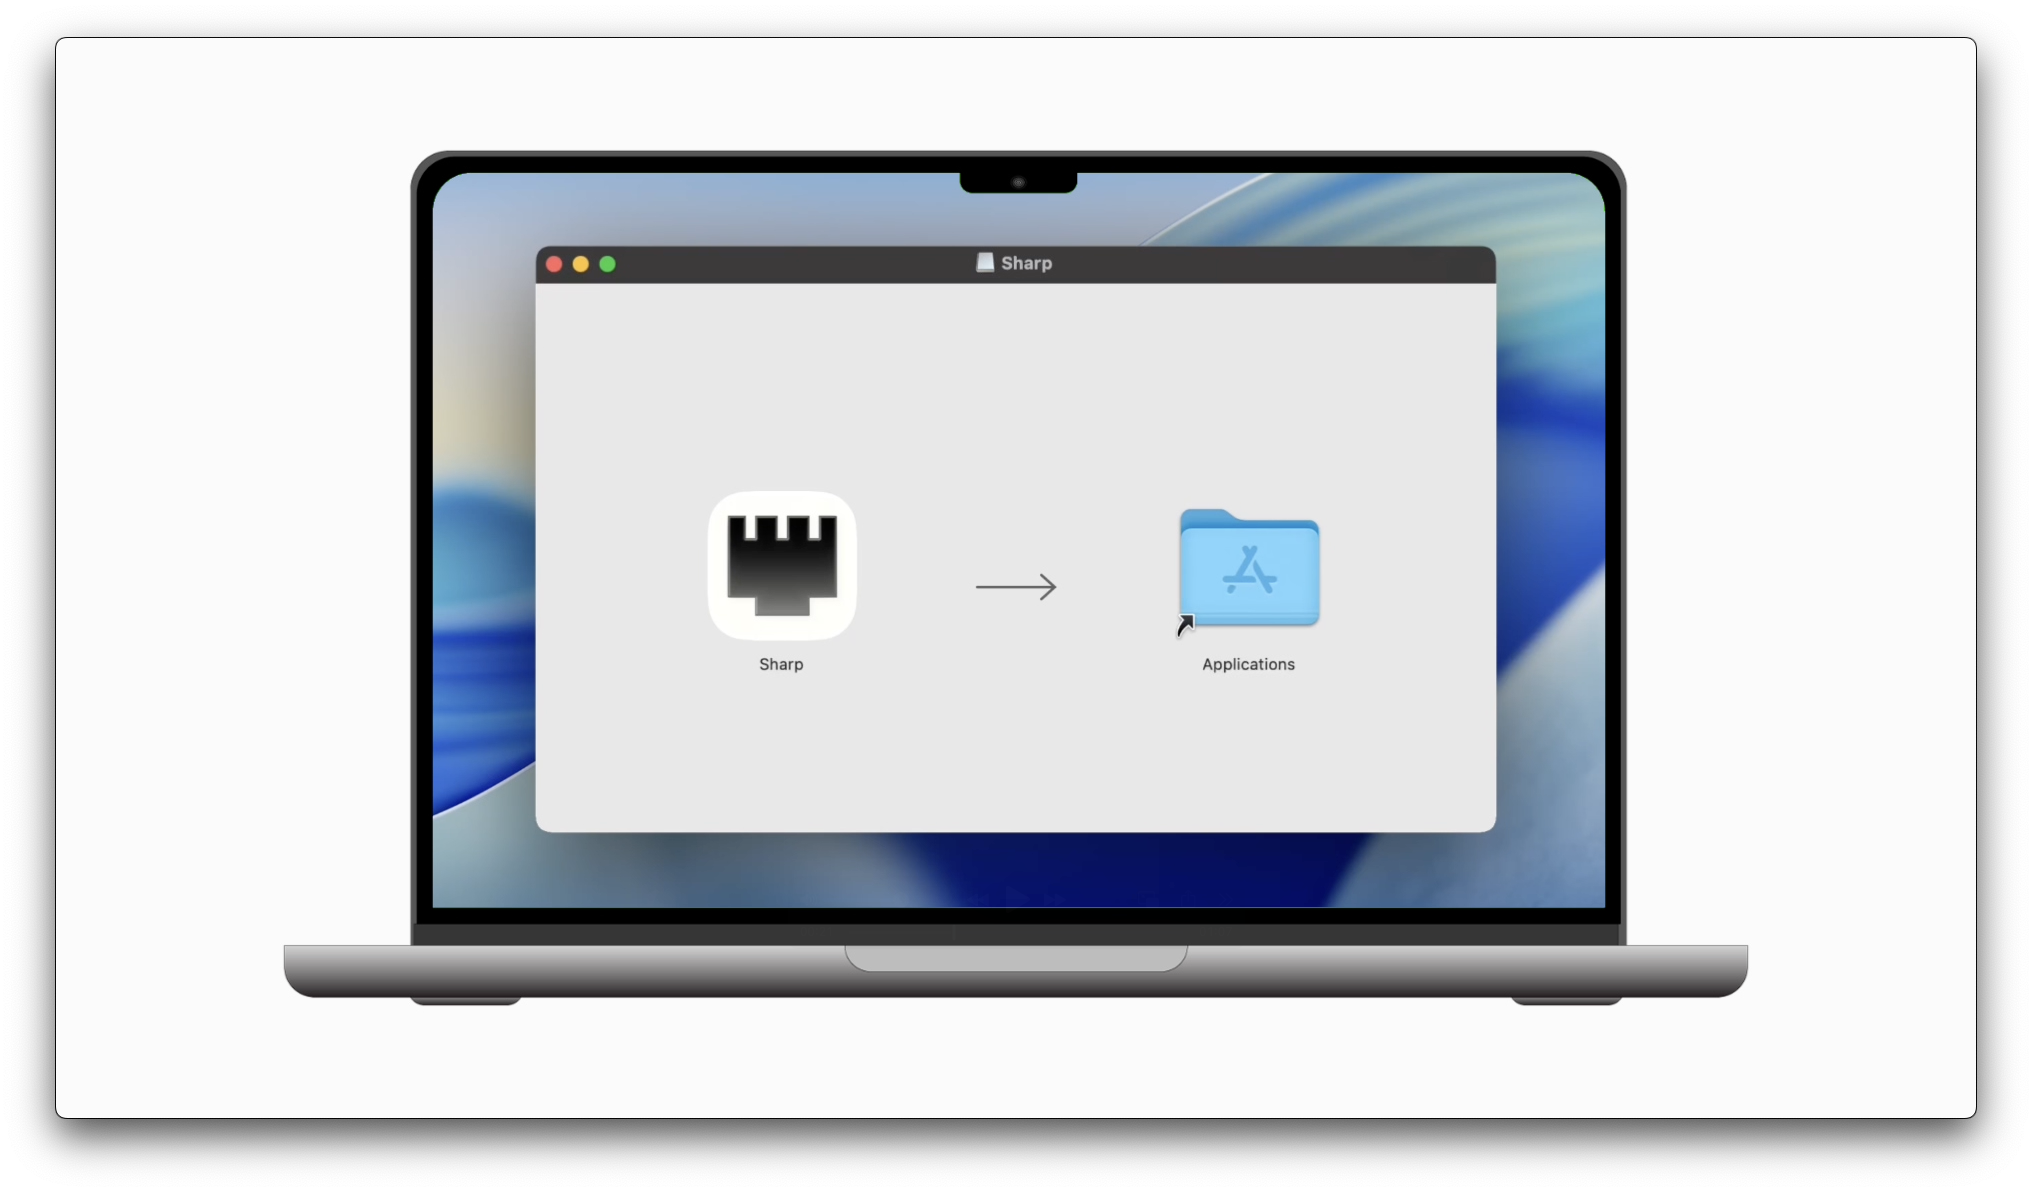
Open the downloaded disk image. Drag Sharp into Applications, then open the app from there. Do this on both Macs.
3. Allow it to open
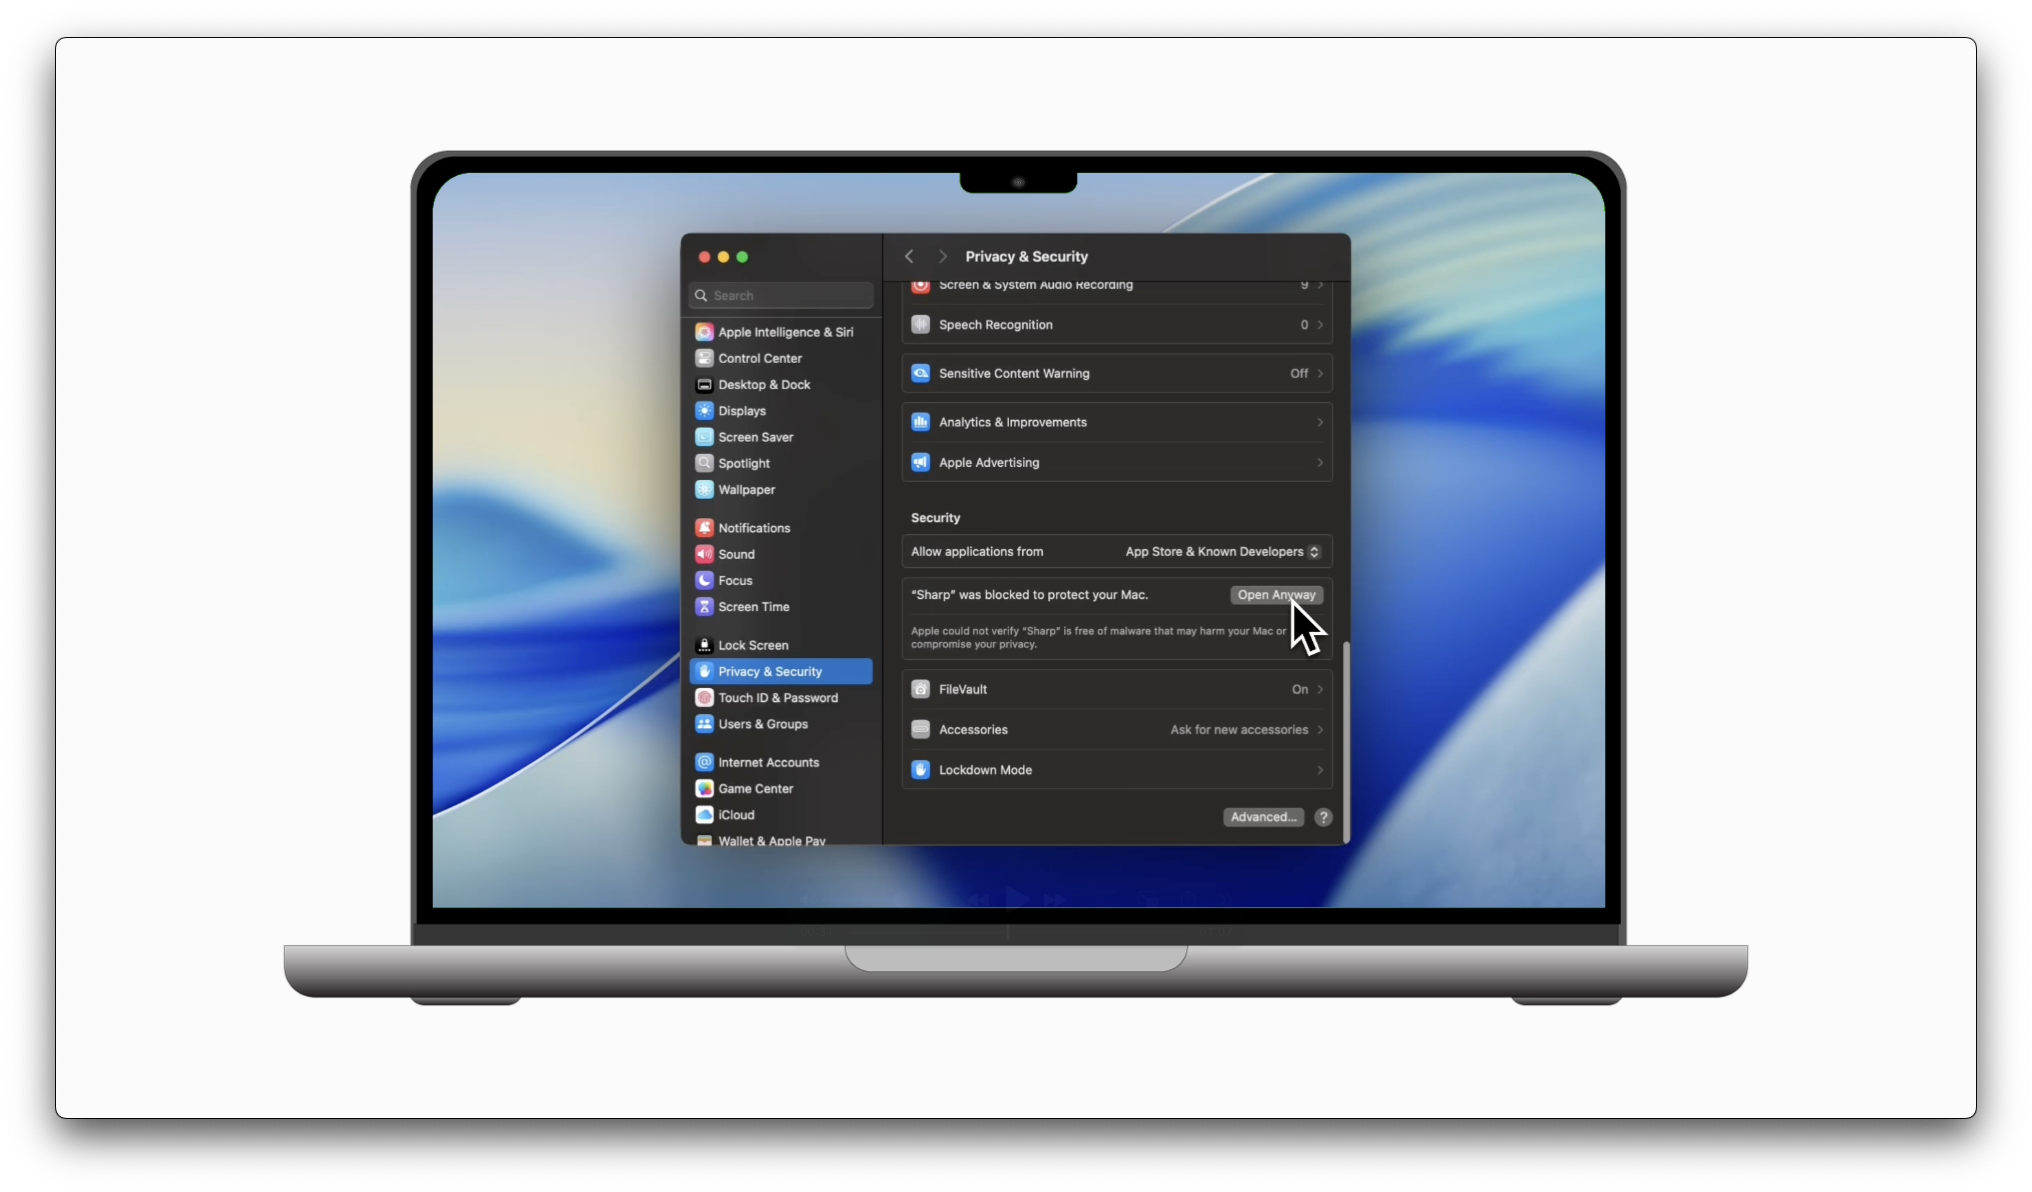
If macOS blocks the first launch, open System Settings → Privacy & Security and choose Open Anyway for Sharp.
On older macOS versions, look under System Preferences → Security & Privacy.
4. Choose which Mac sends
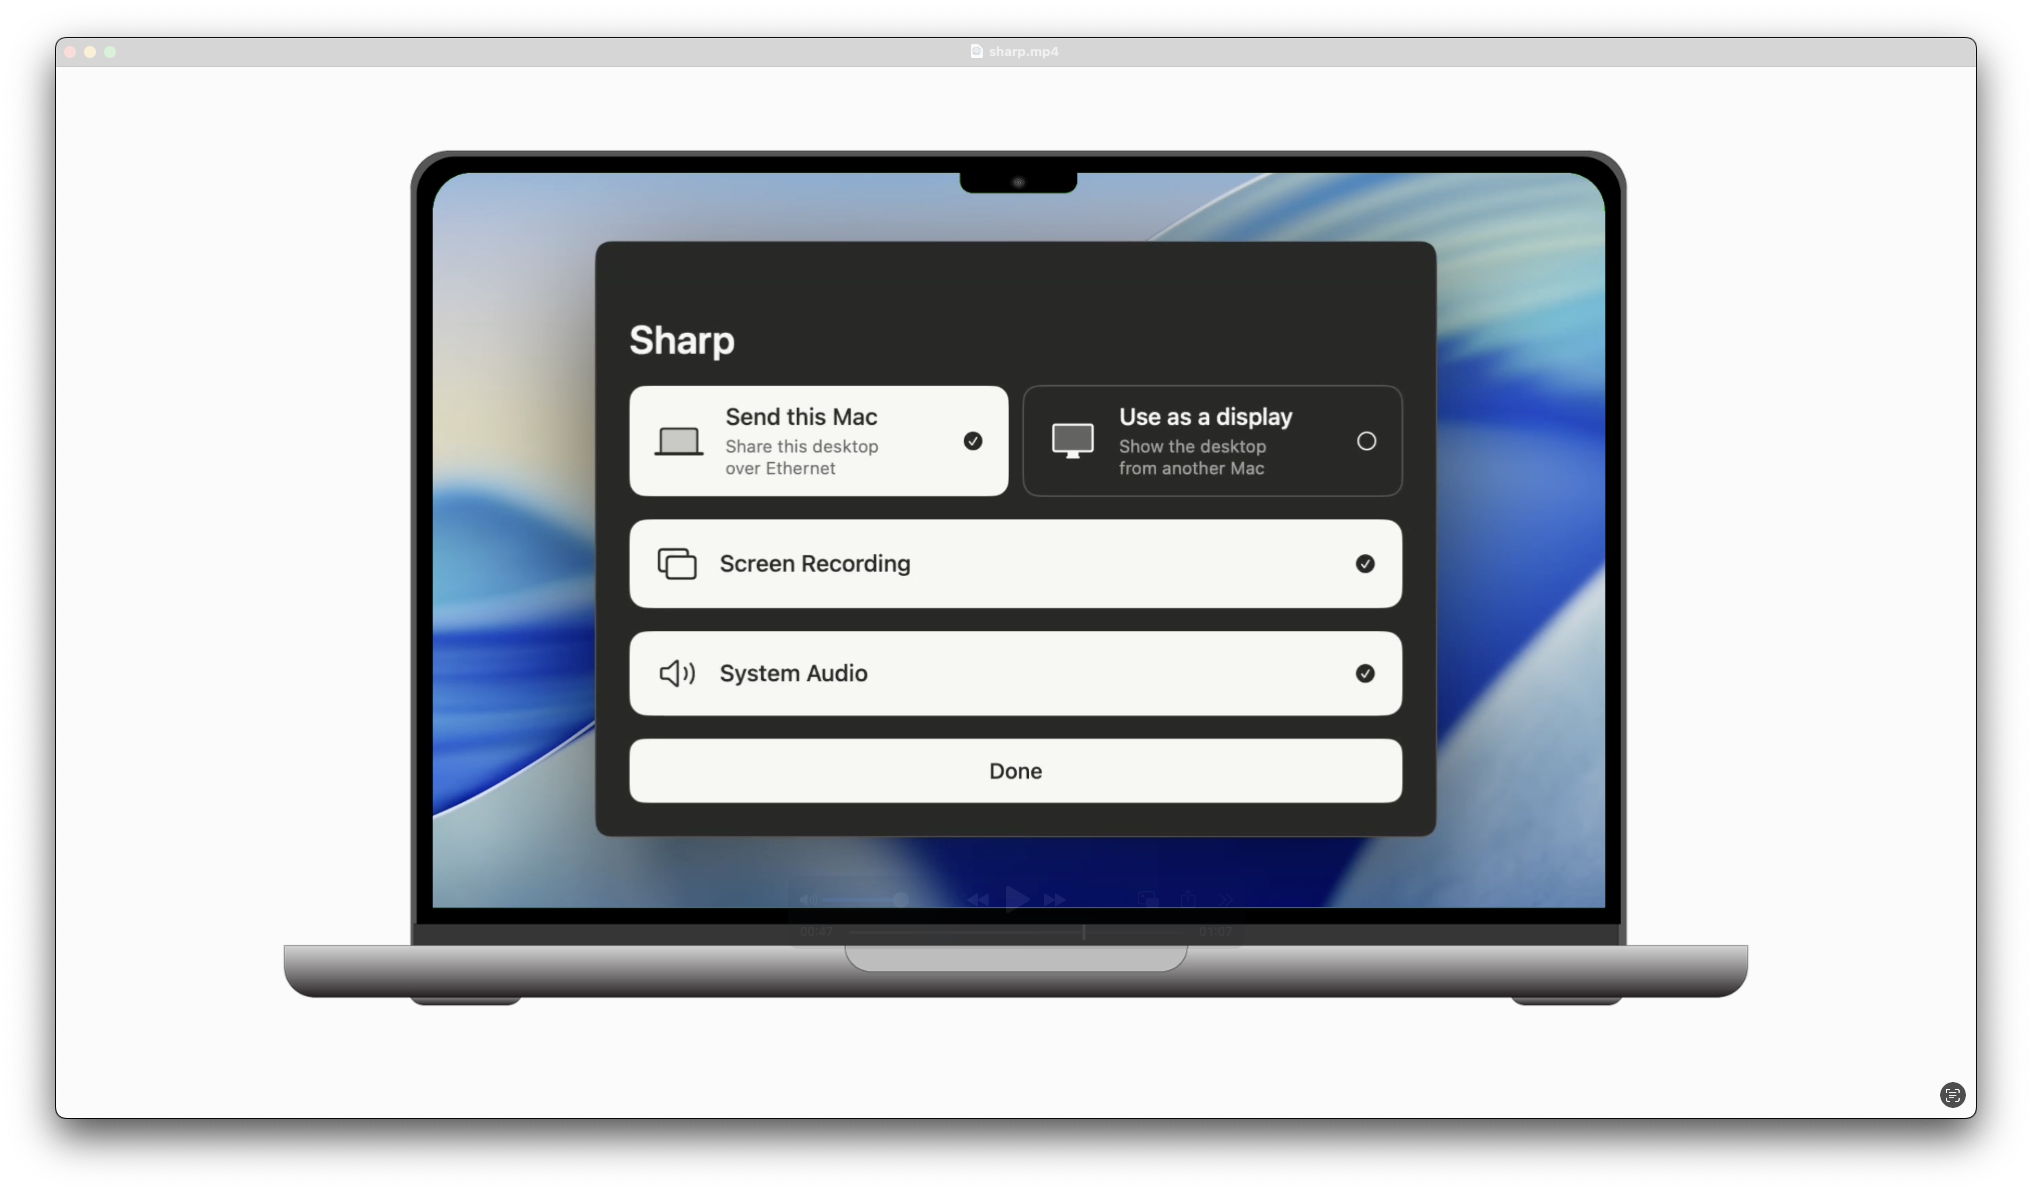
On your newer Mac, choose Send this Mac. Grant Screen Recording permission and, if you want sound on the iMac, System Audio permission. Reopen Sharp if macOS asks, then click Done.
On the iMac, choose Use as a display.
5. Plug in the cable
Connect the Macs over Ethernet. Sharp finds the other Mac and chooses the interface for you.
Open Sharp in the menu bar. When you see Connected above the other Mac's name, you're streaming.
Mirror or extend
Sharp starts in Mirror mode, with the same desktop on both screens. Choose Extend when you want more room. Arrange the screens in macOS Display settings to match your desk, then move a window over to the iMac.
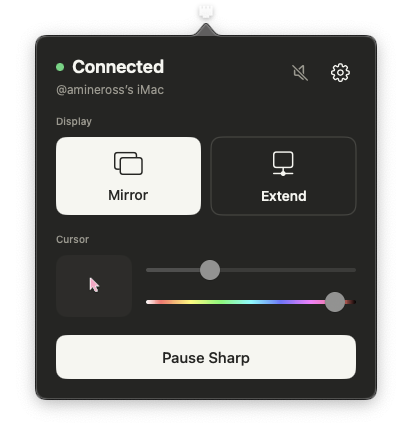
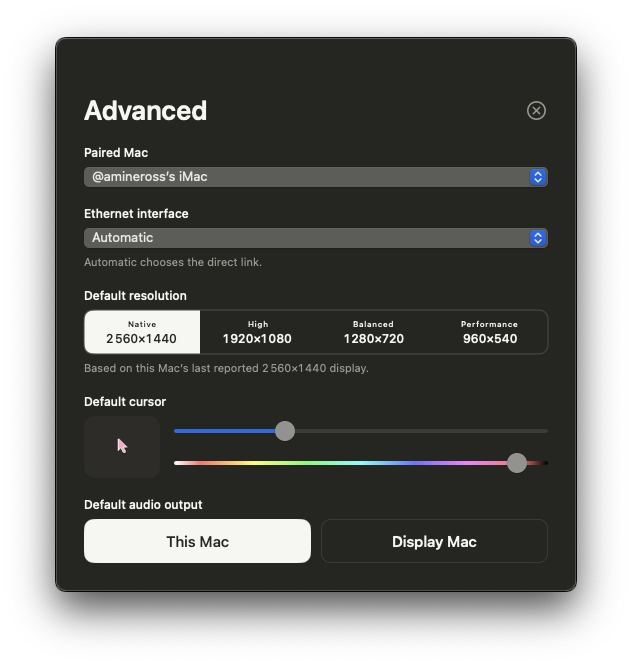
The sliders let you change the cursor's size and colour on the iMac. You'll see the changes there as you make them. Click the speaker to choose whether sound plays on the sending Mac or the display Mac.
Pause Sharp stops the stream. You can resume it from the same place.
The settings you might need later
The gear opens the full settings window. Resolution choices depend on the display you've connected, including its proportions.
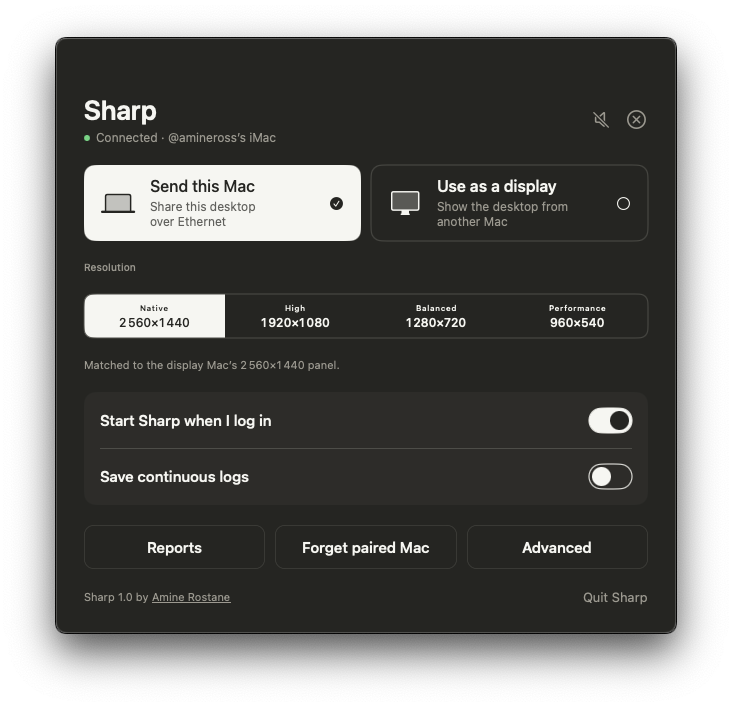
Sharp starts within the pixel budget we've tested, equivalent to 2560 × 1440. You can choose a higher resolution marked Experimental. A 5K iMac won't start with a 5K stream by default; we haven't established the same performance at that resolution.
Under Advanced, choose a paired Mac to save its own defaults. That includes resolution, cursor appearance and audio output. You can also select an Ethernet interface if your setup needs it.
If something feels wrong, open Reports and choose Create report. Open reports takes you to the files you can share with an issue on GitHub.
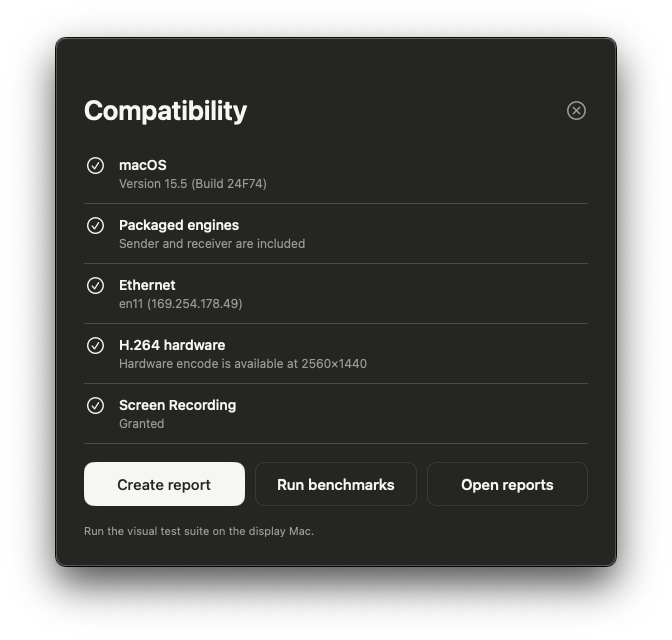
You can also Run benchmarks from the sending Mac while streaming. These are the visual tests we used during development, with moving shapes, page changes and fine text. Sharp saves the test output and engine measurements so we can investigate how it behaves on your setup.
Thank you for reading.